Components
- Pressure Sensor
- Arduino
- LED
- Power
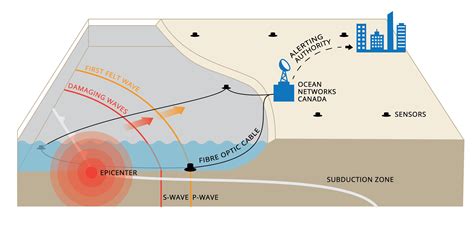
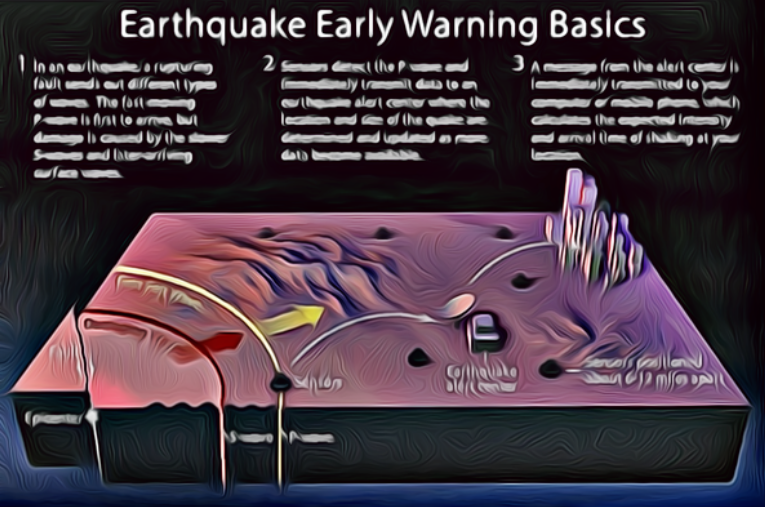
In the blink of an eye, earthquakes hit. Important information must be sent in real-time through warning and alert systems. In this blog article, I’ll explain how I went about developing an earthquake alarm system, the challenges I encountered, the resources I discovered, and the conclusions I took.
What Is the Function of the Earthquake Warning System?
I’m simulating or creating the Earthquake effect with a pressure sensor. Its value fluctuates depending on how hard I push it, and that’s what we’re going to work with. As a warning indication, I’m utilising an LED. We will have some form of public announcement speakers in the real world application. Let’s continue working with Dino gem on the seismic alarm.
Dino Gem Setup
You do not need to reinstall the Dino gem if you already have it installed. If not, go back to the first part of the RubyBits series to learn how to set up the Dino gem.
Developing the Earthquake Alarm Code
The code for earthquake alert is extremely similar to the code for Smart Lighting and Package Delivery Detector, two other projects I’ve worked on previously. The only difference is that we now submit data to PubNub on a regular basis. Then we’ll develop a dashboard with freeboard.io to keep track of our data in real time. As a result, this is a whole package.

First, let’s look at the code:
Make a list of all the gems you’ll need.
Set up the hardware with the pins that were requested. We only need an Arduino board, a Pressure Sensor, and an LED for this application.
The LED is attached to pin 1 and the sensor is connected to pin ‘A0’ (change to whatever you wish). I named the LED variable buzzer since LEDs and buzzers both switch on and off the light/sound in the same way. The buzzer can be connected to it. Initially, the buzzer was activated.

As previously, initialise and set up the PubNub variable.
To obtain your unique pub/sub keys, you must first create a PubNub account. Once you’ve signed up, go to the PubNub Developer Dashboard to acquire your unique PubNub keys. Our free Sandbox tier should provide you with enough bandwidth to develop and test your web messaging API app.
Now we define which message should be delivered to PubNub in response to a certain user’s event. (This is when the pressure sensor detects a change in its value.)
When the sensor receives data, we convert it to a Float type (it is a String type by default) and divide it by 100 to get data similar to a Richter scale, such as 6.51, 3.78, and so on. We then put it on terminal and use the.publish function to transmit it to our PubNub instance.
The message payload is a key-value pair of key Magnitude and value as the data from the sensor in Richter scale form, and the channel we’re publishing to is earthquake frequency.
On the other hand, we use our PubNub instances to subscribe to the earthquake frequency channel.
Way of subscribing
We’re applying logic to data that’s been received. Put “EARTHQUAKE ALARM…” on terminal and switch on the buzzers if the value of the Magnitude key in the message payload is greater than 5.3. (here we have LEDs). Otherwise, nothing should happen, and everyone should be able to live in peace? We chose 5.3 as the reference value since it is a moderate earthquake.
Code :
 # List all gems that are required.
require 'rubygems'
require 'bundler/setup'
require 'dino'
require 'pubnub'


# Setup the hardware with their pins specified.
board = Dino::Board.new(Dino::TxRx::Serial.new)
sensor = Dino::Components::Sensor.new(pin: 'A0', board: board)
buzzer = Dino::Components::Led.new(pin: 1, board: board)


# Initially set the buzzer off.
buzzer.send(:off)


# Initializing and setting up the pubnub variable.
# ------------
@pubnub = Pubnub.new(
:subscribe_key    => 'sub-c-49d69172-3e94-11e4-8c81-02ee2ddab7fe',
:publish_key      => 'pub-c-67b64f52-9ac9-42df-9803-55fc0a646b22',
:error_callback   => lambda { |msg|
puts "Error callback says: #{msg.inspect}"
},
:connect_callback => lambda { |msg|
puts "CONNECTED: #{msg.inspect}"
}
)


# Subscribing the channel to/from which message are to be passed/collected.
@pubnub.subscribe(
:channel  => 'earthquake_frequency'
){|data|
# Logic of what to do on client side when message is analysed.
if data.message['Magnitude'] > 7.50
puts "EARTHQUAKE ALARM..."
buzzer.send(:on)
else
buzzer.send(:off)
end
}
# ------------


# Specifies what message is to be sent to pubnub on a particular user's event. (Here, when pressue sensor senses the change in it's value).
# ------------
sensor.when_data_received do |data|
mag = (data.to_f)/100
puts mag
@pubnub.publish(:message => {'Magnitude' => mag}, :channel => 'earthquake_frequency', :http_sync => true)
end


sleep
Running the Code in Terminal
Go into the directory where the file is located inside the terminal. Run ruby earthquake_alarm_freeboard.rb When you run it, you can see the changes in value on the terminal with the logic of printing “EARTHQUAKE ALARM…”. If you check out the PubNub’s Developer Console, you can see the data arriving in real-time with almost no delay (don’t forget to mention the same channel, publish key and subscribe key). Plus the LED (which we called buzzer in the code) also works accordingly.
“Saving someone else’s (human/animals/birds etc.) life is the greatest thing you can do in this world” – KP
Helping Hands.


Este projeto nos ajuda muito obrigado por compartilhar. Eu amei 😉
J’ai personnellement trouvé cela vraiment utile un grand merci à karan 🙂